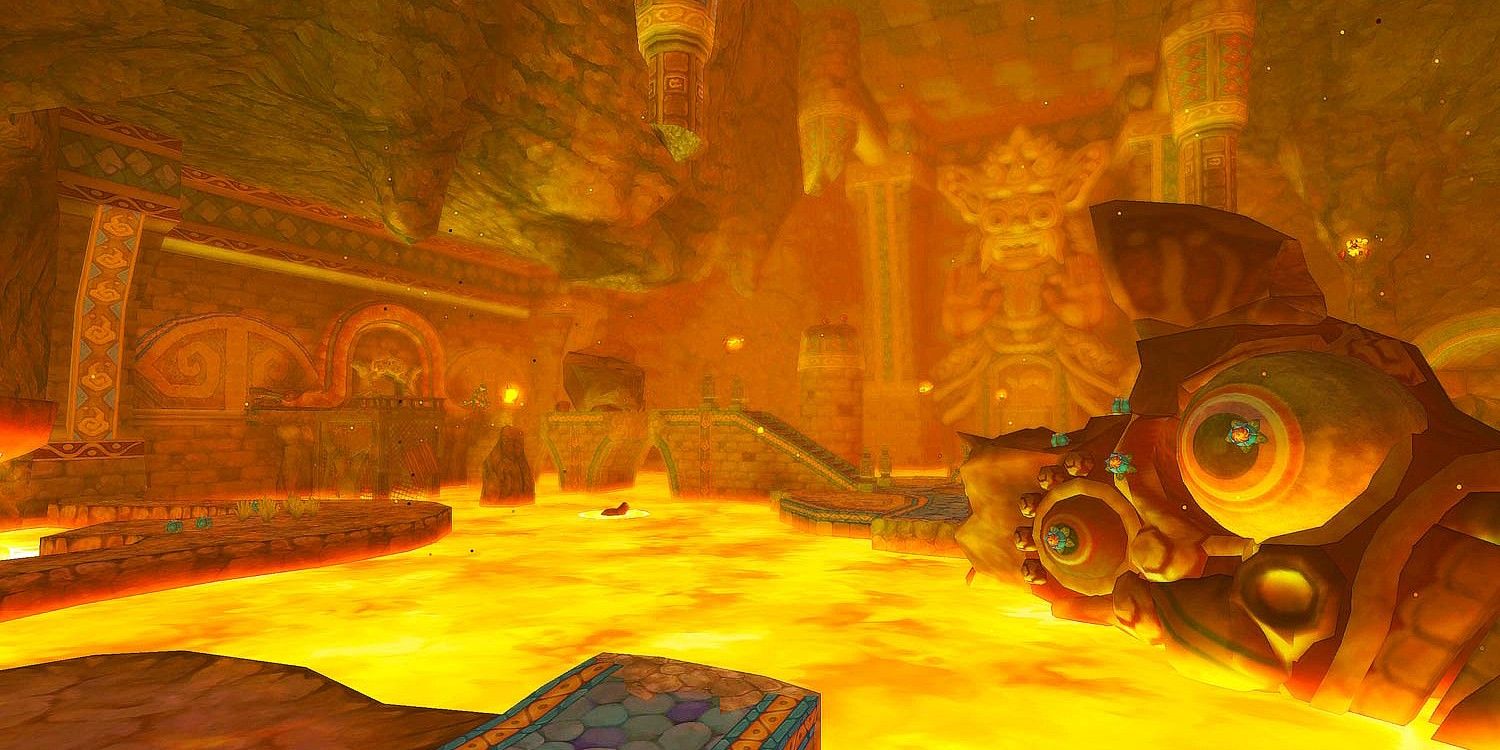
While Skyview Temple serves as something of an introduction to The Legend of Zelda: Skyward Sword HD‘s dungeons, things really heat up with the Earth Temple — both metaphorically and literally. After making his way through Eldin Volcano, Link must navigate the Earth Temple in hopes of finding Zelda. In doing so, he faces some pretty tough opponents and some tricky puzzles.
Here’s how to get through The Legend of Zelda: Skyward Sword‘s Earth Temple.
How to Get Past the Drawbridge
After entering the Earth Temple, head forward and jump across the platforms. Watch out for the Fire Keese on the way, On the other side, take out the Red Chuchu and dig at the hole on the right. Take the air vent up to get a Red Rupee. Go back down and head straight across the other set of platforms, taking out the Fire Keese on the way. Inside, Cobal will tell Link that his partner is missing and mention that he saw Zelda. Dig in the holes to get Rupees and hearts. However, watch out, as the hole on the left contains a Red Chuchu.
Go back into the main room and head up the stairs in the center. Wait for either of the platforms to descend to the level of the lava and then jump on it, as Link can reach either with a single jump. Then, when the geyser carries the platforms back up, head to the staircase on the other side of the lava.
Link is now in front of a drawbridge. Cut the ropes on both sides of the platform and then use the Beetle to sever the one by the drawbridge itself. Head across the drawbridge and into the next area.
How to Get the Bomb Bag
Next up on the agenda is going to be getting Skyward Sword‘s bomb bag. First, though, Link must face off against a Lizalfos. The easiest way to take them down is to either parry a blow or get them when they’re using their flamethrower. Alternatively, it’s also possible to hit them with a Skyward Strike when they jump back and then to deliver a fatal blow. Don’t forget to dig at the marked spots once the Lizalfos is dead.
In front of Link is a broken piece of statue. Pull out the Slingshot or Beetle and hit one of the Bomb Flowers to dislodge the statue’s eye. Jump onto the eye and roll to the left. Dig at the marked spots and then wait for the platform to come down. Toss a Bomb Flower onto the platform to blow up the rocks at the top. Go up and open the chest to get a Golden Skull.
Head back down and jump onto the eye. Direct the ball through the broken bridge and land on the island on the other side. Open the chest to get a Blue Bird Feather and dig the holes. From this island, Link can see a plunger by the lowered walkway connected to the platform in the middle of the room. Push the ball into the plunger.
Now, head back to the southeast corner of the room and talk to Ledd, who explains his Bomb Bag has gone missing. Crawl beneath the fence forward and to the left. Take out the Bokoblin inside. Keep climbing up to find a fairy and some rupees. Head back down and roll one of the Bomb Flowers through the entryway to blow up the rocks. This reveals a door.
Head through the door. Inside, Link must face two Lizalfos. Use the same strategy mentioned above to take them out. A good strategy is to try and isolate the two, as they can be hard to take on together. Once they’re defeated, a chest appears in the room. Open it up to get the Bomb Bag. Before leaving the room, also make sure to get the Amber Relic by the door.
Leave the room and talk to Ledd, who will give Link the Bomb Bag. Since the Bomb Bag isn’t filled, head back inside the room where Link fought the Bokoblin earlier and stock up on Bomb Flowers.
How to Get the Earth Temple’s Dungeon Map
Use the ball to head back to the center of the room. Go up the staircase to Link’s left and watch out for the Fire Keese. Toss a bomb onto the pile of rocks on the other side of the walkway to clear a path forward. Jump across and take out the Lizalfos on the other side. Then, head through the door.
There are a number of dig spots in this room. Once Link has them, head across the platforms towards the far side of the room. For the most part, there’s no need to worry about the Magma Spumes, as they’re not really able to hit Link if he’s moving. Take out the Bokoblin and then use the geyser to get up to the upper area. There are some more Bokoblins up here, so take them out and open the chest in the middle of the room to get the dungeon map.
How to Raise the Walkway
Go back to the main room and head towards the east side. There’s a crack in the wall just past the Magma Spume, which Link can kill by rolling over it with the ball. Throw two bombs at the crack to open a new area. Maneuver the ball past the lava spouts and land on the first platform, which is near a Magma Spume. Restock on Bomb Flowers inside and dig at the marked locations to get some hearts. Watch out, though, as a Red Chuchu is in the dig spot on the left.
Head back out and continue on to the next area. Kill the Bokoblin and then look back the way Link came. On the right is another cracked wall. Throw two bombs at it and head through the tunnel, taking a left when Link reaches the T-intersection. Kill the Magma Spume and then get off onto the platform.
Use the Beetle to cut the robe just above the gate. Then, send another Beetle through the tunnel on the left by the Bird Statue. Keep the Beetle high to avoid the Bokoblins and then circle it around into the rope at the top of the door.
Get back on the ball and roll to the other side. To save, get off onto the platform and head up the tunnel, killing the two Bokoblins along the way. Otherwise, keep heading down the tunnel. Wait for the statue to stop spewing lava before continuing on and then navigate the tight curve with a crevice all around it. Go slowly and be careful.
On the other side of the crevice, a bunch of Fire Keese attack Link, so take them out. Then, continue on and get off on the platform on the left. Kill the Lizalfos and then dig at the spot to get a bunch of hearts. Jump up to the chest to get a Red Rupee.
There’s also a plunger on this side of the walkway. Drive the ball into it to raise the walkway. Head back onto the central platform and then go up the stairs. Head through the door to enter the next area.
How to Get the Dragon Sculpture
Cross over to the bottom of the ramp and start dashing up. If Link stops dashing, he’ll fall down. After a few feet, boulders start falling. Jump into the alcove on the left and wait out the two waves. Keep going up the ramp, making sure to dash the whole way. When Link gets to the bottom of the next ramp, don’t go up. Instead, crawl through the hole on the right. Dig at the two dig spots to reveal an air geyser.
Go up the air geyser and continue up to the balcony. Link will need to destroy the rocks inside the alcove here. To do this, turn a bit to Link’s right and then toss a bomb as close as he can to the far wall. The bomb should go off right as it reaches the rocks.
Head back down to the bottom of the ramp and then repeat the process from before, waiting in the alcove as the boulders roll down. Soon, Link ends up on a platform with a Bird Statue. Save here, as the next part can easily result in an instadeath. Once ready, go up the stairs and open the chest at the end to get the Dragon Sculpture. There’s also an Amber Relic up here.
As Link starts to descend, a boulder comes down after him. Run down the ramp and get off at the stairs on Link’s left, just before the end. Getting hit by the boulder results in a game over. Save at the Bird Statue and then fit the Dragon Sculpture into the door to open the final area.
RELATED: The Legend of Zelda: Every Main Series Console Release, Ranked by Critics
How to Beat Pyroclastic Fiend Scaldera
Head up the stairs and stop at the platform. Stock up on hearts and Bomb Flowers, as the Earth Temple’s boss battle is coming up. When ready, head to the top of the stairs and jump onto the next ramp. Keep running up. Eventually, Ghirahim interrupts Link and sics Pyroclastic Fiend Scaldera on him.
A big part of beating Pyroclastic Fiend Scaldera has to do with learning how to throw bombs well. In the fight’s first stage, run up the ramp and throw a bomb at Scaldera. It rolls back quite far down the ramp. Chase after Scaldera and throw a bomb into its mouth when its inhaling to remove some of its armor. This exposes an eye. Attack the eye with Link’s sword.
Repeat this process, restocking at the Bomb Flowers at the top of the ramp when necessary. There are also a number of hearts. While up there, Scaldera throws fireballs at Link, so watch out.
When Scaldera’s armor is gone, the boss changes forms and starts running up the ramp. Then, Scaldera rolls down the ramp. This isn’t particularly hard to avoid. When Scaldera is going up the ramp, position Link between its legs. When it’s rolling down, position Link on either side of the ramp. After Scaldera finishes rolling back down, throw a bomb into its mouth.
Eventually, Scaldera goes down. Pick up the Heart Container it leaves and head through the door into the Earth Spring. After the cutscene, head behind the altar and capture or use the fairies there. When ready, use a Skyward Strike to activate the altar and get the Amber Tablet, which unlocks the next area of the game when brought to the Statue of the Goddess in Skyloft.
About The Author